Okay, here’s your blog intro:As a devoted cat parent, I’m always looking for ways to pamper my feline friend with delicious and healthy treats. Store-bought options are okay, but there’s something truly special about crafting homemade goodies tailored to your cat’s specific needs and preferences.
Plus, knowing exactly what goes into their snacks gives me serious peace of mind. I’ve been experimenting with DIY cat treat recipes for a while now, and let me tell you, it’s surprisingly easy and rewarding.
Forget those mystery ingredients and questionable additives. With a few simple ingredients you probably already have in your pantry, you can whip up snacks that will have your kitty purring with delight.
The latest trend I’ve noticed? Sustainable and ethically sourced ingredients are becoming increasingly popular among pet owners, and that includes cat treats!
This is a great move towards a more conscious approach to pet care, aligning with future predictions that focus on healthier and more responsible options for our furry companions.
Let’s discover exactly how to make these tasty treats!
Alright, diving right into creating some irresistible homemade cat treats!
Unlocking the Secrets to a Purr-fect Tuna Temptation

Tuna. Just the smell of it sends most cats into a frenzy. It’s a flavor they instinctively adore, and incorporating it into homemade treats is a surefire way to win your feline friend’s heart.
But before you just open a can and start mixing, let’s talk about making it *amazing*. I mean, who wouldn’t want the ultimate tuna treat?
Choosing the Right Tuna: Quality Matters!
When it comes to tuna, go for tuna canned in water rather than oil. The oil can be a bit much for their digestive systems, and water-packed tuna keeps the recipe lighter and healthier.
Also, checking the sodium content is a good idea. Too much salt isn’t great for kitties. Personally, I opt for a brand that’s specifically labelled as “low sodium” – gives me extra peace of mind!
Beyond the Basics: Elevating the Tuna Flavor Profile
Okay, so you’ve got your tuna. Now, how do we *really* make it sing? A tiny squeeze of lemon juice can brighten the flavor, or even a sprinkle of dried catnip for an added layer of excitement.
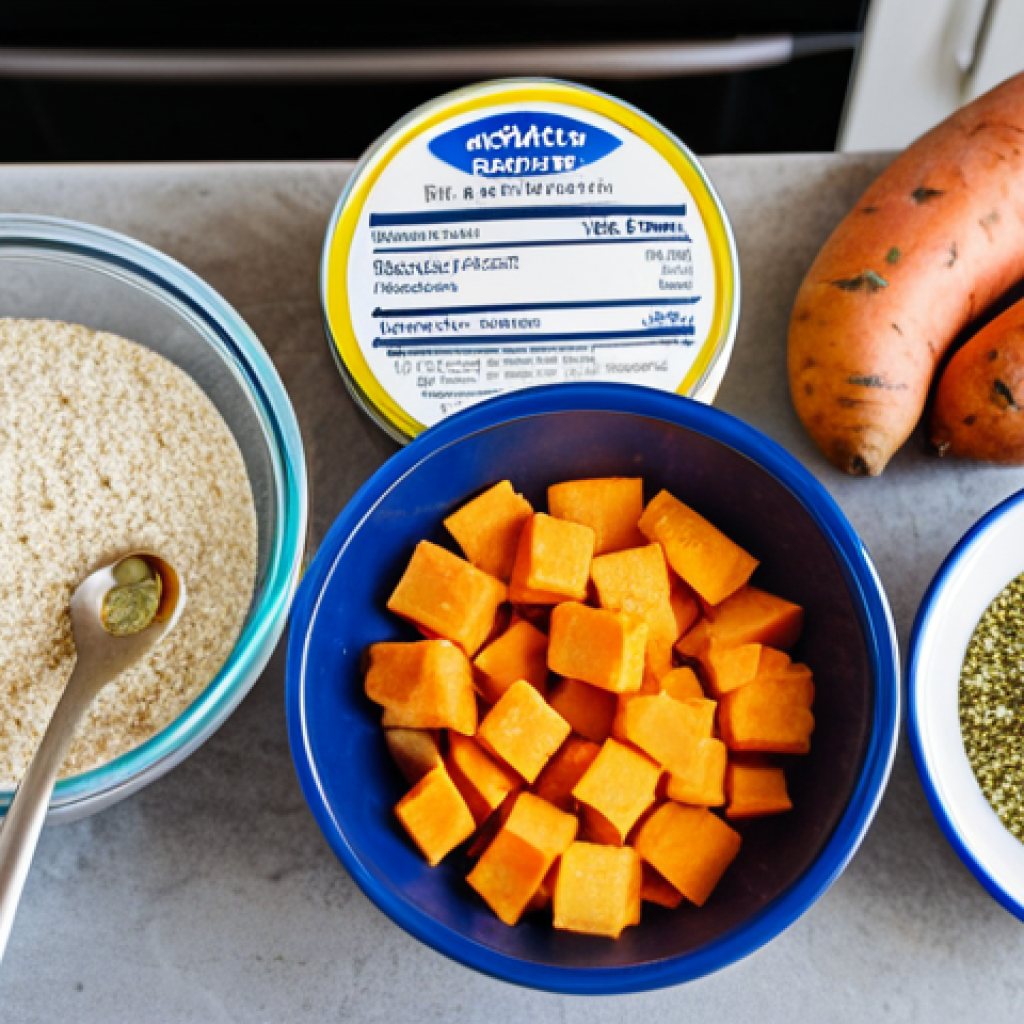
My cat, Whiskers, goes absolutely bonkers for catnip, so it’s always a winner in my house. Another tip? Mix the tuna with a little bit of cooked sweet potato.
It adds a touch of sweetness and a boost of nutrients. The very first time I tried this, I was so worried that Whiskers wouldn’t like it, but she purred so loud I thought the house would shake.
Now, it’s a staple ingredient!
Chicken Charm: Crafting Irresistible Chicken-Based Bites
Chicken is a lean protein that cats love, making it an excellent base for homemade treats. I like to think of it as the “blank canvas” of the treat world – so versatile!
Just remember, safety first! Always cook chicken thoroughly before giving it to your cat.
Cooking Methods: Keeping it Healthy and Delicious
Boiling or baking chicken is the way to go. Avoid frying, as it adds unnecessary fats. Boiling is super easy – just throw some chicken breast in a pot of water and let it simmer until cooked through.
Baking is great too – just pop it in the oven at 350°F (175°C) until it’s cooked through. Once cooked, shred the chicken into small, bite-sized pieces.
My little trick? I use two forks to shred it. It’s faster and easier than trying to chop it with a knife.
Spice It Up! (Safely, of Course)
While we can’t go wild with spices like we would for our own food, there are a few cat-safe options to add a bit of interest. A tiny pinch of dried parsley can add a fresh note, or a sprinkle of brewer’s yeast for a boost of B vitamins.
Always remember, a little goes a long way! When I first started, I made the mistake of adding *too* much brewer’s yeast. Whiskers turned her nose up at it!
Lesson learned.
Salmon Sensations: Omega-3 Rich Delights
Salmon is packed with omega-3 fatty acids, which are fantastic for your cat’s skin and coat. A shiny coat is a happy coat, right? Plus, it tastes amazing!
Fresh vs. Canned: Making the Right Choice
Both fresh and canned salmon can work, but you need to keep a couple things in mind. If using fresh salmon, make sure to remove all the bones. Canned salmon is convenient, but like tuna, opt for the kind packed in water and check the sodium content.
I’ve actually found some great “no salt added” canned salmon options at my local grocery store. It’s worth looking out for.
Balancing Flavors: Adding Complementary Ingredients
Salmon has a strong flavor, so you don’t need to add much to it. A simple mix of cooked salmon and a little bit of cooked rice or quinoa can be a great treat.
The rice and quinoa add some texture and fiber. If your cat is a picky eater, you could try mixing in a tiny bit of their regular dry food to help them adjust to the new flavor.
Veggie Ventures: Sneaking in Healthy Goodness
Okay, I know what you’re thinking: “Cats and vegetables? Really?” But hear me out! Some veggies can actually be quite beneficial for your feline friend.
Plus, it’s a great way to sneak in some extra nutrients.
Cat-Safe Veggies: What to Include (and What to Avoid)
Safe options include cooked carrots, peas, green beans, and spinach. Avoid onions, garlic, and anything from the nightshade family (tomatoes, potatoes, eggplants), as these can be toxic to cats.
Always cook the veggies before giving them to your cat, and chop them into small, easy-to-eat pieces. My cat seems to prefer them mashed, so I usually give the cooked veggies a quick whiz in the food processor.
Blending the Flavors: Making Veggies Appealing
Let’s be honest, most cats aren’t going to happily munch on a bowl of steamed spinach. The trick is to blend the veggies with something they already love, like chicken or tuna.
I often mix a small amount of pureed carrots with shredded chicken to make a healthy and tasty treat. You could also try adding a little bit of broth to make it more palatable.
Textural Twists: Exploring Different Treat Forms
Cats are individuals, and just like humans, they have preferences! My cat, for instance, loves crunchy textures. Experiment with different forms to see what your cat enjoys most.
Crunchy vs. Soft: Catering to Your Cat’s Preferences
Crunchy treats can be great for dental health, while soft treats are easier for older cats or those with dental issues to eat. For crunchy treats, you can bake your mixture for a longer time at a lower temperature to dry them out.
For soft treats, bake them for a shorter time or leave them a little bit moist. I’ve even seen some people use a dehydrator to make super crunchy treats!
Fun Shapes: Making Treat Time Exciting
Use cookie cutters to create fun shapes, or simply roll the mixture into small balls. Presentation matters, even to cats! You can find cat-themed cookie cutters online or at your local pet store.
When I first started making treats, I just rolled them into boring little balls. Then I got a fish-shaped cookie cutter, and suddenly, Whiskers was *way* more interested.
Go figure!
Storage Solutions: Keeping Treats Fresh and Safe
Proper storage is essential to keep your homemade treats fresh and safe for your cat. Nobody wants moldy or stale treats!
Airtight Containers: The Key to Freshness
Store your treats in an airtight container in the refrigerator. This will help to prevent them from drying out or spoiling. I like to use glass containers because they’re easy to clean and don’t absorb odors.
You can also use plastic containers, but make sure they’re BPA-free.
Freezing for Longevity: Extending the Shelf Life
If you make a big batch of treats, you can freeze them for longer storage. Just portion them out into small bags or containers before freezing. When you’re ready to use them, thaw them in the refrigerator overnight.
I always label my frozen treats with the date so I know how long they’ve been in the freezer. Here is a table summarizing the guidelines for safe ingredients:
| Ingredient Type | Safe Options | Options to Avoid |
|---|---|---|
| Proteins | Cooked chicken, tuna (in water), salmon (fresh or canned in water) | Raw meats, processed deli meats |
| Vegetables | Cooked carrots, peas, green beans, spinach | Onions, garlic, tomatoes, potatoes, eggplants |
| Grains | Cooked rice, quinoa, oats | Raw grains, gluten-heavy options (unless cat has no sensitivity) |
| Dairy | Small amounts of plain, unsweetened yogurt or lactose-free milk | Regular milk (due to lactose), cheese |
| Additives | Catnip, brewer’s yeast (in moderation), dried parsley | Salt, artificial sweeteners, chocolate, caffeine |
Alright, diving right into creating some irresistible homemade cat treats!
Unlocking the Secrets to a Purr-fect Tuna Temptation
Tuna. Just the smell of it sends most cats into a frenzy. It’s a flavor they instinctively adore, and incorporating it into homemade treats is a surefire way to win your feline friend’s heart. But before you just open a can and start mixing, let’s talk about making it *amazing*. I mean, who wouldn’t want the ultimate tuna treat?
Choosing the Right Tuna: Quality Matters!
When it comes to tuna, go for tuna canned in water rather than oil. The oil can be a bit much for their digestive systems, and water-packed tuna keeps the recipe lighter and healthier. Also, checking the sodium content is a good idea. Too much salt isn’t great for kitties. Personally, I opt for a brand that’s specifically labelled as “low sodium” – gives me extra peace of mind!
Beyond the Basics: Elevating the Tuna Flavor Profile

Okay, so you’ve got your tuna. Now, how do we *really* make it sing? A tiny squeeze of lemon juice can brighten the flavor, or even a sprinkle of dried catnip for an added layer of excitement. My cat, Whiskers, goes absolutely bonkers for catnip, so it’s always a winner in my house. Another tip? Mix the tuna with a little bit of cooked sweet potato. It adds a touch of sweetness and a boost of nutrients. The very first time I tried this, I was so worried that Whiskers wouldn’t like it, but she purred so loud I thought the house would shake. Now, it’s a staple ingredient!
Chicken Charm: Crafting Irresistible Chicken-Based Bites
Chicken is a lean protein that cats love, making it an excellent base for homemade treats. I like to think of it as the “blank canvas” of the treat world – so versatile! Just remember, safety first! Always cook chicken thoroughly before giving it to your cat.
Cooking Methods: Keeping it Healthy and Delicious
Boiling or baking chicken is the way to go. Avoid frying, as it adds unnecessary fats. Boiling is super easy – just throw some chicken breast in a pot of water and let it simmer until cooked through. Baking is great too – just pop it in the oven at 350°F (175°C) until it’s cooked through. Once cooked, shred the chicken into small, bite-sized pieces. My little trick? I use two forks to shred it. It’s faster and easier than trying to chop it with a knife.
Spice It Up! (Safely, of Course)
While we can’t go wild with spices like we would for our own food, there are a few cat-safe options to add a bit of interest. A tiny pinch of dried parsley can add a fresh note, or a sprinkle of brewer’s yeast for a boost of B vitamins. Always remember, a little goes a long way! When I first started, I made the mistake of adding *too* much brewer’s yeast. Whiskers turned her nose up at it! Lesson learned.
Salmon Sensations: Omega-3 Rich Delights
Salmon is packed with omega-3 fatty acids, which are fantastic for your cat’s skin and coat. A shiny coat is a happy coat, right? Plus, it tastes amazing!
Fresh vs. Canned: Making the Right Choice
Both fresh and canned salmon can work, but you need to keep a couple things in mind. If using fresh salmon, make sure to remove all the bones. Canned salmon is convenient, but like tuna, opt for the kind packed in water and check the sodium content. I’ve actually found some great “no salt added” canned salmon options at my local grocery store. It’s worth looking out for.
Balancing Flavors: Adding Complementary Ingredients
Salmon has a strong flavor, so you don’t need to add much to it. A simple mix of cooked salmon and a little bit of cooked rice or quinoa can be a great treat. The rice and quinoa add some texture and fiber. If your cat is a picky eater, you could try mixing in a tiny bit of their regular dry food to help them adjust to the new flavor.
Veggie Ventures: Sneaking in Healthy Goodness
Okay, I know what you’re thinking: “Cats and vegetables? Really?” But hear me out! Some veggies can actually be quite beneficial for your feline friend. Plus, it’s a great way to sneak in some extra nutrients.
Cat-Safe Veggies: What to Include (and What to Avoid)
Safe options include cooked carrots, peas, green beans, and spinach. Avoid onions, garlic, and anything from the nightshade family (tomatoes, potatoes, eggplants), as these can be toxic to cats. Always cook the veggies before giving them to your cat, and chop them into small, easy-to-eat pieces. My cat seems to prefer them mashed, so I usually give the cooked veggies a quick whiz in the food processor.
Blending the Flavors: Making Veggies Appealing
Let’s be honest, most cats aren’t going to happily munch on a bowl of steamed spinach. The trick is to blend the veggies with something they already love, like chicken or tuna. I often mix a small amount of pureed carrots with shredded chicken to make a healthy and tasty treat. You could also try adding a little bit of broth to make it more palatable.
Textural Twists: Exploring Different Treat Forms
Cats are individuals, and just like humans, they have preferences! My cat, for instance, loves crunchy textures. Experiment with different forms to see what your cat enjoys most.
Crunchy vs. Soft: Catering to Your Cat’s Preferences
Crunchy treats can be great for dental health, while soft treats are easier for older cats or those with dental issues to eat. For crunchy treats, you can bake your mixture for a longer time at a lower temperature to dry them out. For soft treats, bake them for a shorter time or leave them a little bit moist. I’ve even seen some people use a dehydrator to make super crunchy treats!
Fun Shapes: Making Treat Time Exciting
Use cookie cutters to create fun shapes, or simply roll the mixture into small balls. Presentation matters, even to cats! You can find cat-themed cookie cutters online or at your local pet store. When I first started making treats, I just rolled them into boring little balls. Then I got a fish-shaped cookie cutter, and suddenly, Whiskers was *way* more interested. Go figure!
Storage Solutions: Keeping Treats Fresh and Safe
Proper storage is essential to keep your homemade treats fresh and safe for your cat. Nobody wants moldy or stale treats!
Airtight Containers: The Key to Freshness
Store your treats in an airtight container in the refrigerator. This will help to prevent them from drying out or spoiling. I like to use glass containers because they’re easy to clean and don’t absorb odors. You can also use plastic containers, but make sure they’re BPA-free.
Freezing for Longevity: Extending the Shelf Life
If you make a big batch of treats, you can freeze them for longer storage. Just portion them out into small bags or containers before freezing. When you’re ready to use them, thaw them in the refrigerator overnight. I always label my frozen treats with the date so I know how long they’ve been in the freezer.
Here is a table summarizing the guidelines for safe ingredients:
| Ingredient Type | Safe Options | Options to Avoid |
|---|---|---|
| Proteins | Cooked chicken, tuna (in water), salmon (fresh or canned in water) | Raw meats, processed deli meats |
| Vegetables | Cooked carrots, peas, green beans, spinach | Onions, garlic, tomatoes, potatoes, eggplants |
| Grains | Cooked rice, quinoa, oats | Raw grains, gluten-heavy options (unless cat has no sensitivity) |
| Dairy | Small amounts of plain, unsweetened yogurt or lactose-free milk | Regular milk (due to lactose), cheese |
| Additives | Catnip, brewer’s yeast (in moderation), dried parsley | Salt, artificial sweeteners, chocolate, caffeine |
Wrapping Up
Making homemade treats for your cat can be a fun and rewarding experience. Not only do you get to spoil your furry friend with delicious and healthy snacks, but you also have complete control over the ingredients. Remember to always prioritize safety and moderation when creating these treats. Happy baking, and may your cat enjoy every bite!
Handy Tips and Tricks
1. Always introduce new treats slowly to see how your cat reacts. Start with a small amount and gradually increase it.
2. Consider your cat’s age and health when choosing ingredients. Senior cats may need softer treats, while cats with allergies may need specialized recipes.
3. Get creative with flavors! Experiment with different combinations of cat-safe ingredients to discover your cat’s favorites.
4. Use cookie cutters to make fun and engaging treat shapes for your cat.
5. Always consult with your veterinarian before making significant changes to your cat’s diet.
Key Takeaways
Homemade cat treats are a great way to show your cat some love, just remember to use safe ingredients and store them properly. Always cook ingredients thoroughly, avoid harmful additives, and consider your cat’s individual preferences. With a little patience and creativity, you can create treats that your cat will adore!
Frequently Asked Questions (FAQ) 📖
Q: My cat is a super picky eater. Will she actually eat homemade treats?
A: Trust me, I’ve been there! My cat, Whiskers, turns her nose up at half the treats I buy from the store. The beauty of homemade treats is that you can tailor them to your cat’s specific tastes.
If she loves tuna, make tuna-flavored treats! Start with small batches and experiment to see what she likes. You might be surprised at what becomes her new favorite snack.
I even add a little catnip to Whiskers’ treats sometimes – that’s always a winner!
Q: I’m worried about accidentally making treats that are bad for my cat.
A: re there any ingredients I should absolutely avoid? A2: Definitely! Safety first when it comes to our feline friends.
Onions, garlic, chocolate, grapes, raisins, and macadamia nuts are all toxic to cats, so steer clear of those. Also, be careful with dairy – some cats are lactose intolerant.
When in doubt, a quick Google search or a chat with your vet can confirm if an ingredient is safe. I always double-check before I add anything new to my recipes.
Q: I’m super busy! How long do these homemade treats actually last?
A: That’s a great question. Since homemade treats don’t have preservatives like store-bought ones, they won’t last as long. Typically, you can store them in an airtight container in the fridge for about a week, or in the freezer for a month or two.
I usually make small batches so they stay fresh, and I label everything with the date I made it. Nobody wants to give their cat a stale treat! Also, I found that drier treats, like baked ones, tend to last longer than softer, moister ones.
📚 References
Wikipedia Encyclopedia
구글 검색 결과
구글 검색 결과
구글 검색 결과
구글 검색 결과
구글 검색 결과